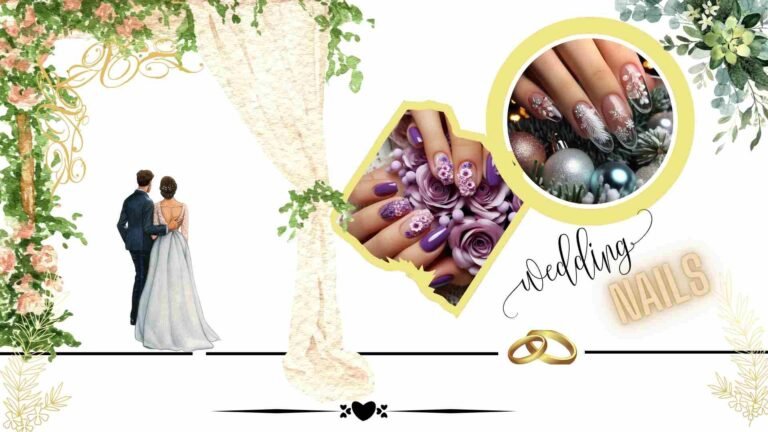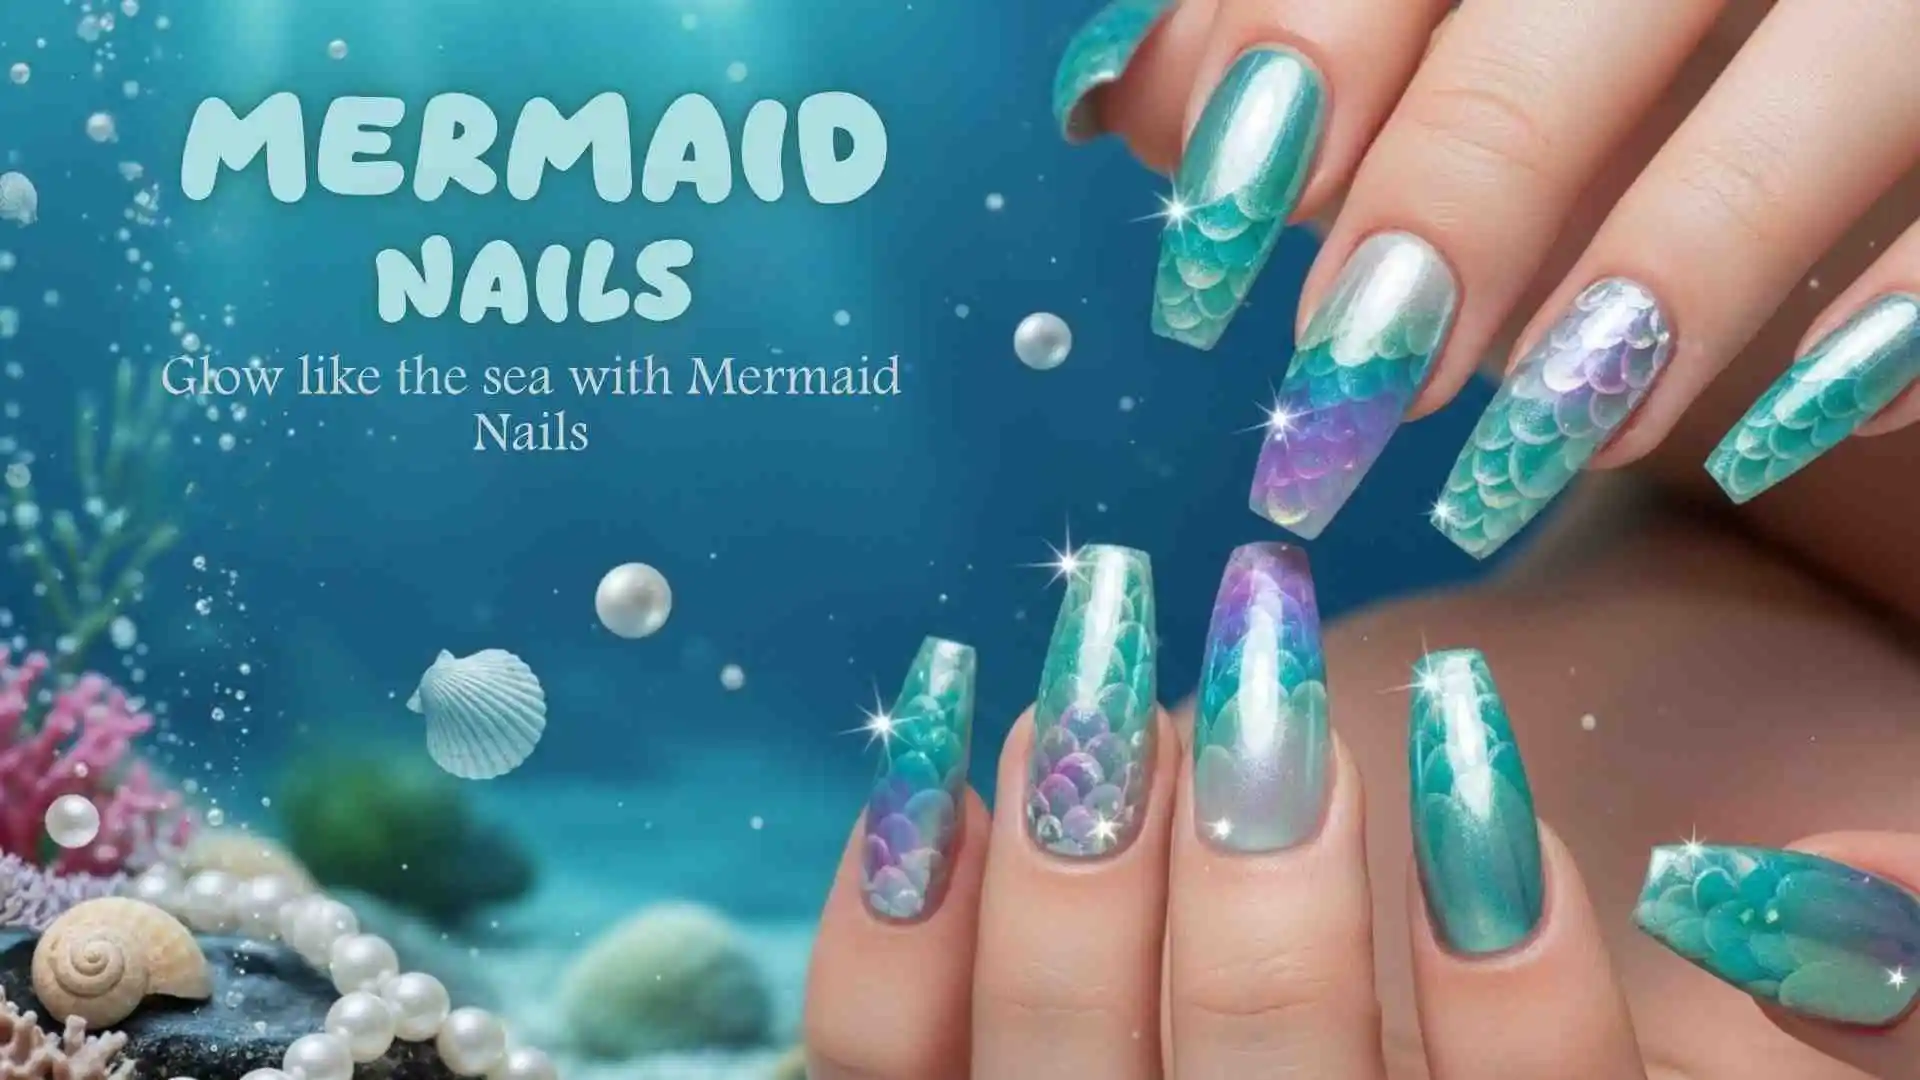
Mermaid Nails: Designs | Colors | Tips
If you’re dreaming of nails that look like they belong under the sea, mermaid nails are the perfect choice. This trend blends shimmering finishes, ocean-inspired colors, and magical textures to create a manicure that’s bold, fun, and beautiful. Whether you want something subtle or full-on fantasy, mermaid nails offer endless creative options.
check out more designs at solar nails.
What Are Mermaid Nails?
Mermaid nails are inspired by the ocean and mythical sea creatures. The design often features iridescent, holographic, or shimmering finishes that shift in the light — just like a mermaid’s tail. Common colors include blues, greens, purples, teals, and silvers.
Textures also play a big role. You’ll see designs that include:
- Chrome or metallic powders for a reflective, scale-like shine
- Glitter or shimmer polish that mimics sparkling sea water
- 3D accents (like tiny shells, pearls, or rhinestones) for added dimension
Popular Mermaid Nails Designs & Color Ideas
Iridescent Teal and Blue Nails
If you want your nails to look like they just surfaced from an enchanted ocean, iridescent teal and blue nails are the way to go. This design combines two of the most iconic mermaid shades — teal and ocean blue — layered with a shimmering, color-shifting finish that glows in the light. The result is magical, bold, and perfect for anyone who wants their manicure to stand out with a soft underwater sparkle.
🎨 Popular Color Variations
✅ Teal base with blue chrome powder — creates a glowing, mirror-like surface that shifts color depending on lighting
✅ Blue-to-teal gradient — a smooth ombré that mimics tropical waters
✅ Aqua and turquoise shimmer polish — layered with an iridescent topcoat for a radiant finish
✅ Sheer base with teal shimmer tips — gives the look of sunlit water dancing on your nails
Each combo brings the sea to your fingertips while staying wearable and versatile.
🛠 How to Achieve the Look
Chrome or mirror powder method:
Apply a deep blue or teal gel polish as the base. After curing, rub in an iridescent or chrome powder in shades of green or aqua. This technique gives the nails that glistening, reflective look.
Teal-to-blue sponge gradient:
Use a makeup sponge to blend a gradient from blue at the base to teal at the tip (or vice versa). Add a shimmer topcoat to make the colors pop.
Iridescent topcoat:
Finish the look with a specialty topcoat that contains micro-glitter or pearl pigments for a glowing, holographic sheen.
💡 Tip: Use color-shifting powders that reflect pink, green, or violet in different angles to add more ocean magic.
💅 What Makes This Design Special?
✔ The colors are ocean-perfect and always in style
✔ Iridescent finishes make your nails shift colors in different lighting
✔ Easy to enhance with 3D pearls, foils, or scale stamps
✔ Works great on long almond or stiletto nails but looks just as beautiful on short square nails


Purple-to-Blue Ombré with Shimmer
If you want a soft, magical nail look that feels like a dreamy ocean sunset, purple-to-blue ombré nails with shimmer are perfect. This design blends two cool-toned shades — deep ocean blue and mermaid violet — creating a smooth gradient that’s calm, classy, and eye-catching. A layer of shimmer polish adds light-catching sparkle, making your nails glow without going over the top.
🎨 Popular Color Variations
✅ Pastel purple fading into light turquoise — subtle and feminine, great for shorter nails
✅ Royal blue blending into lavender — bold yet elegant with a luxe feel
✅ Deep purple base with aqua shimmer overlay — darker and more dramatic with intense shine
✅ Gradient with silver or holo flakes — adds depth and a little sparkle movement
The ombré fade can be horizontal (base to tip) or vertical (side-to-side), depending on your style. Both give a flowing, mermaid-inspired look.
🛠 How to Achieve the Look
Sponge gradient technique:
Apply purple and blue polish side-by-side on a sponge. Gently dab onto the nail, letting the colors blend naturally. Repeat in thin layers to build the fade smoothly.
Brush-blend method:
Apply purple on one half of the nail, blue on the other. While both are still wet, lightly blend where they meet using a small, dry brush or a clean sponge tip.
Add shimmer topcoat:
Once the gradient is dry, apply a fine shimmer or iridescent topcoat to unify the look and add light-catching magic.
💡 Tip: Use a white or pale base coat to make pastel gradients pop and shimmer reflect more clearly.
💅 What Makes This Design Special?
✔ Combines two beautiful sea-inspired shades for a fluid, elegant look
✔ Gradient style gives a natural transition, ideal for mermaid and ocean nail themes
✔ Shimmer overlay brings soft sparkle — not too bold, just the right glow
✔ Looks great on oval, almond, and stiletto nails, but also works for short square shapes
holographic scales design
If you’re ready to go full-on mermaid fantasy, holographic scales are the ultimate showstopper. This nail art creates the illusion of real mermaid tails with scale-like patterns that shimmer and shift color in the light. It’s bold, playful, and perfect for special occasions or when you just want to feel magical.
🎨 Popular Color Variations
✅ Silver holographic scales over a sea-green base — classic mermaid vibes with high shine
✅ Rainbow holo foil over deep navy or teal polish — creates contrast and makes the scales pop
✅ Pink or lilac base with iridescent scales — soft and dreamy with a fairytale look
✅ Chrome base + laser holo pattern — high-reflection design that glows under sunlight or flash
The holographic effect gives a multi-color reflection that changes as your hands move — exactly like fish scales in water.
🛠 How to Achieve the Look
Scale stamping or decals:
Use a stamping plate with a scale pattern and transfer it over a shiny or holographic base. Top it with a high-gloss topcoat.
Hand-painted method:
With a fine brush and steady hand, paint curved “U” shapes across the nails. Layer with holo polish or glitter in each scale for extra sparkle.
Foil or sticker overlay:
Apply holographic nail foil or pre-cut stickers shaped like fish scales over a base polish. Seal with clear topcoat to lock in the design.
💡 Tip: Use gel polish for your base so the scales sit smoothly and stay vibrant longer.
💅 What Makes This Design Special?
✔ Looks like real mermaid skin — perfect for festivals, parties, or bold summer looks
✔ Holographic finish adds dimension and glow in every light
✔ Can be customized with different color schemes for subtle or dramatic impact
✔ Works well on longer nail shapes (almond, stiletto, coffin), but looks cute on short nails too


Sheer Base with Aqua Glitter Tips
Looking for a soft, wearable mermaid nail look that still sparkles? Sheer base with aqua glitter tips delivers just that. It’s subtle and elegant — like ocean foam catching the sunlight. The sheer base keeps things minimal, while the aqua glitter adds a splash of sea-inspired magic to the tips. It’s like a French manicure… with a mermaid twist.
🎨 Popular Color Variations
✅ Clear pink or nude base with chunky aqua glitter tips — clean and bold contrast
✅ Milky white base + fine teal shimmer tips — soft and ethereal
✅ Jelly base with holographic aqua glitter — great for a juicy, high-shine finish
✅ Glass nail effect + turquoise micro-glitter — gives a barely-there glow that shifts with the light
This style is perfect for mixing sparkle with simplicity. It’s light, fresh, and goes with every outfit.
🛠 How to Achieve the Look
Glitter tip fade method:
Start with a sheer nude or jelly polish. Then, apply glitter polish starting at the tip and gently drag it downward to fade into the base.
Loose glitter technique:
Paint a clear or nude base coat. While still tacky, dip nail tips into loose aqua glitter. Shake off excess and top with two layers of clear topcoat to seal.
French line method:
Use striping tape to outline a clean tip area. Apply aqua glitter polish just on the tip. Remove tape before it dries for a crisp, defined glitter line.
💡 Tip: Use a mix of chunky and fine glitter for more texture and reflection — this gives a “wet shimmer” effect like ocean waves.
💅 What Makes This Design Special?
✔ Combines elegance with sparkle — perfect for everyday or events
✔ Easy to DIY or request at a salon
✔ Looks stunning on both short and long nails
✔ Aqua glitter gives that subtle mermaid energy without going over the top
Mermaid Chrome Nails
If you’re after a bold, mirror-like finish with magical underwater vibes, mermaid chrome nails are the ultimate choice. They reflect light like the surface of the sea, giving your nails an iridescent, glowing finish that shifts color depending on the angle. This look is sleek, shiny, and absolutely mesmerizing — just like a mermaid’s tail in the sun.
🎨 Popular Color Variations
✅ Aqua chrome — gives off strong oceanic vibes, perfect for that “fresh out of the sea” look
✅ Teal to lavender shift chrome — changes color with movement for that dreamy, fantasy finish
✅ Mint green chrome with blue undertones — looks clean, soft, and pearlescent
✅ Iridescent white chrome — reflects hints of pink, blue, and silver like seashells or pearls
Each shade catches the light beautifully, offering a polished, holographic effect without the use of glitter.
🛠 How to Achieve the Look
Chrome powder over gel polish:
Start with a base color that complements your chrome powder (like teal, blue, or lilac). Cure the gel polish, then gently rub chrome powder over the nail using a sponge applicator until you get that glassy finish.
Chrome top coat method:
Use a ready-made chrome-effect topcoat over a colored base. It’s simpler and still gives that luminous effect, especially when sealed with a glossy finish.
Double-layer technique for depth:
Layer chrome powder over a colored chrome polish. This adds dimension, giving the nail a deeper, mermaid-scale reflection.
💡 Tip: Use a no-wipe gel top coat before applying the chrome powder. It helps the powder stick and shine brighter.
💅 What Makes This Design Special?
✔ Ultra-reflective finish mimics scales or underwater shimmer
✔ Color shifts based on light and angle — never looks the same twice
✔ Minimal texture but maximum effect — perfect for a clean, glossy look
✔ Great choice for almond, coffin, and stiletto nail shapes


Ocean Green Nails with Pearl Accents
If you want something that feels soft, oceanic, and luxurious at the same time, ocean green nails with pearl accents are your go-to. This look blends the calming vibes of seafoam green with the elegance of tiny pearl details — like treasures from the deep sea. It’s subtle, graceful, and mermaid-approved.
🎨 Popular Color Variations
✅ Soft sea green base with white pearl studs — minimalist and elegant
✅ Jade green with scattered mini pearls — richer in tone, giving royal ocean vibes
✅ Mint chrome with accent pearls on the ring finger — a mix of shine and texture
✅ Teal matte polish + glossy pearls — contrast between finish types for a modern touch
Pearls can be used sparingly for a delicate look or clustered for a more 3D, bejeweled feel.
🛠 How to Achieve the Look
Pearl placement method:
Paint your nails with an ocean green base (gel or regular). Once tacky or cured, place flat-back nail pearls using tweezers and a dab of nail glue. Press gently, then seal around them with a top coat for durability.
Accent-only style:
Place pearls only on accent nails (like the ring finger or thumb). Keep the rest clean and glossy for contrast.
Pearl cluster tips:
Create a “crescent moon” of pearls near the base or tips of the nail for a modern, stylish layout.
💡 Tip: Use small pearls in different sizes to create depth and a natural, ocean-treasure look.
💅 What Makes This Design Special?
✔ Combines ocean-inspired tones with elegant pearls for a soft, regal look
✔ Easy to customize — minimal or maximal based on your vibe
✔ Pearls add dimension without being too flashy
✔ Ideal for beach weddings, summer events, or daily wear with a twist
🛠 How to Achieve the Look
Chrome or powder method:
Mermaid nails often use chrome or pearl powders applied over gel polish to give that magical, reflective shine. These powders are gently rubbed onto cured polish to create the smooth, shimmery finish.
Glitter layering:
Apply loose glitter or shimmer polish in thin layers to build up the sparkle. You can fade it from the tip downward or go full glitter across the nail.
Stamping or hand-painting scales:
For detailed designs, use a stamping plate with a scale pattern or hand-paint small overlapping curves with a fine brush.
💡 Tip: A glossy topcoat enhances the shimmer, while a matte topcoat gives a unique velvety effect that still catches light in a soft way.
💅 What Makes This Design Special?
✔ Mermaid nails are eye-catching, fun, and perfect for creative expression
✔ The design works on any nail length and shape
✔ There’s endless room to customize — from subtle shimmer to bold, fantasy-inspired art
✔ The shifting colors and textures look stunning in any lighting