Acrylic Nails vs Dip Nails: Choosing the Perfect Look for You!
Acrylic Nails vs Dip Nails
Which One Is Actually Worth It?
Application, durability, cost, nail health, removal & design — everything you need to choose the right manicure in 2026.

Written by the Solar Nail Design Expert Team
Our licensed nail technicians and beauty writers have compared, tested, and tracked nail enhancement systems across professional salons since 2022.
Acrylic nails combine a liquid monomer with a powder polymer that air-cures into a hard sculpted nail — best for extreme length, bold art, and maximum strength. Dip nails (dip powder / SNS nails) use a cyanoacrylate base coat and colored acrylic powder built up in layers — best for longer wear (3–4 weeks), no odor, lighter feel, and DIY-friendly application. Dip wins on durability and nail health; acrylics win on design versatility and structural strength for extensions.
What Are Acrylic Nails? The Salon Workhorse, Explained
Acrylic nails have been the backbone of nail enhancement for more than four decades — and they’re still one of the most requested services in salons worldwide. The chemistry is elegantly simple but endlessly versatile: a liquid monomer (usually ethyl methacrylate, or EMA) is combined with a powder polymer on a brush to form a pliable bead, which is then pressed onto the natural nail and sculpted before it hardens by air exposure in 30–60 seconds.
This means the nail technician has a brief but crucial window to mold, thin, and shape the product before it locks permanently into place. That sculpting window is what makes acrylics unmatched for extreme nail art, dramatic lengths, and structural nail extensions — things dip powder simply can’t replicate.
The term “acrylic” covers an enormous range of product quality. High-quality EMA-based acrylics (used by reputable salons) are significantly safer and gentler than cheap MMA (methyl methacrylate) products used by some budget salons. MMA is banned as a nail ingredient in several US states due to health risks — always ask your technician what monomer they use.
Acrylic nails — pros and cons:
✅ Advantages of Acrylic Nails
- Unmatched structural strength for long extensions
- Fully sculpt-able — any shape, any length
- Perfect base for complex 3D nail art
- Available at virtually every nail salon globally
- Fillable — no need to remove the full set each time
- Strong enough for coffin, stiletto, ballerina shapes
- Can last up to 4 weeks with proper fills
❌ Disadvantages of Acrylic Nails
- Strong chemical smell from liquid monomer
- Requires more aggressive nail prep (filing)
- Needs fills every 2–3 weeks as nails grow
- Heavier feel on the nail compared to dip
- MMA in cheap products poses health risks
- Not DIY-friendly — hard to get right at home
- Longer salon appointment (60–120 minutes)
What Are Dip Powder Nails? The Modern Low-Maintenance Option
Dip powder nails — also called SNS nails (after the brand Signature Nail Systems that popularized them), dip manicures, or powder dip nails — represent a different approach to nail enhancement that’s been steadily gaining popularity since the mid-2010s. Unlike acrylics, there’s no liquid monomer involved. Instead, the process uses a cyanoacrylate-based base coat (similar chemistry to super glue) combined with a finely milled colored acrylic powder.
Each nail is coated with the base, dipped into the powder, then sealed with an activator and top coat. The result is a layered, lightweight nail enhancement that cures by chemical reaction rather than sculpting — no UV lamp needed, no strong smell, and a surprisingly natural feel on the nail.
Despite the name, many modern salons no longer dip your finger directly into the shared powder jar — a hygiene concern. Instead, they pour or sprinkle powder onto the nail or use individual portions. If you’re at a salon, always ask whether they use single-use powder application to avoid cross-contamination.
Dip powder nails — pros and cons:
✅ Advantages of Dip Nails
- Lasts 3–4 weeks (longer than acrylics without fills)
- No strong chemical odor — virtually smell-free
- Lighter and more natural feel on the nail
- Less nail prep / less aggressive filing required
- No UV lamp needed to cure
- Excellent DIY options via at-home kits
- Wide range of colors and shimmer options
- Faster application than acrylics (30–60 min)
❌ Disadvantages of Dip Nails
- Can’t easily add significant length (no sculpting)
- Layered powder can create uneven edges if rushed
- Shared powder jar = hygiene risk (at some salons)
- Not as structurally strong as acrylics for extensions
- Intricate 3D nail art is more difficult to achieve
- Acetone removal still required (though faster than acrylics)
- Potential cyanoacrylate allergy in sensitive individuals
Acrylic Nails vs Dip Nails: Complete Comparison Table (2026)
Here’s every major comparison factor laid out side by side — from durability and cost to smell and DIY-ability.
| Factor | 💅 Acrylic Nails | ✨ Dip Nails | Winner |
|---|---|---|---|
| Durability | 2–3 weeks before noticeable growth/lifting | 3–4 weeks between new sets | ✨ Dip |
| Structural Strength | Superior — handles long extensions | Moderate — best for natural lengths | 💅 Acrylic |
| Odor During Application | Strong chemical smell (monomer) | Virtually odor-free | ✨ Dip |
| Design Versatility | Unlimited — 3D art, sculpting, any shape | Limited sculpting; great color range | 💅 Acrylic |
| Nail Health (prep) | More filing required | Less prep / less filing | ✨ Dip |
| Full Set Cost (US) | $35–$75 | $35–$60 | ✨ Dip |
| Annual Maintenance Cost | ~17–26 salon visits/year | ~12–17 salon visits/year | ✨ Dip |
| UV Lamp Needed | No (air-cures) | No (chemical cure) | Tie |
| Extension Capability | Excellent — can extend dramatically | Minimal — best on natural nail | 💅 Acrylic |
| Application Time | 60–120 minutes | 30–60 minutes | ✨ Dip |
| DIY-Friendly | Difficult — high skill required | Yes — kits widely available | ✨ Dip |
| Removal Time | 15–25 min acetone soak | 10–20 min acetone soak | ✨ Dip |
| Feel on Nail | Heavier, stiffer | Lighter, more natural | ✨ Dip |
| Salon Availability | Universal — every salon | Most salons (not all stock dip) | 💅 Acrylic |
Application Process: Acrylic Nails vs Dip Nails, Step by Step
Understanding how each type is applied helps explain why they look, feel, and perform so differently.
- Cuticles pushed back, nails lightly filed (etched)
- Dehydrator + primer applied to natural nail
- Plastic tips glued on (if adding length)
- Monomer + polymer beaded on brush, applied to nail
- Tech shapes product while pliable (30–60 sec window)
- Air-cures hard, then filed and shaped
- Finished with gel or regular top coat + polish
- Total time: 60–120 minutes
- Minimal filing — light buff only
- Bond/dehydrator applied
- Base coat applied to nail
- Nail dipped (or powder poured) into colored powder
- Steps 3–4 repeated 2–3 times to build layers
- Activator applied — chemical cure begins
- Filed smooth, then sealed with top coat
- Total time: 30–60 minutes
The most significant practical difference in application: acrylics give the technician a sculpting window — those crucial seconds where the bead is pliable and can be molded into any shape. Dip nails are built through layering, meaning the final shape is determined by filing and buffing after the powder has been applied. This is why acrylics are the choice for extreme coffin, stiletto, or ballerina shapes — and why dip nails work best on natural nail lengths or very modest extensions.
Acrylic application — step by step:
Nail Prep
Cuticles pushed back, surface lightly etched with a coarse file to improve product adhesion.
Tip Application (if needed)
Plastic nail tips sized and glued to the free edge, then blended smooth with a file.
Primer
A nail dehydrator and acid or acid-free primer is applied to maximize the bond and prevent lifting.
Acrylic Application
Brush dipped in monomer then powder to create a bead, which is pressed and shaped onto each nail.
Shape & Finish
Once hard, nails are filed into final shape, buffed smooth, and finished with top coat or gel polish.
Dip powder application — step by step:
Minimal Prep
Light buffing of the nail surface — less aggressive than acrylic prep.
Base Coat
A bonding base coat (cyanoacrylate-based) is brushed onto the nail.
Powder Application
Nail is dipped into (or has poured over it) the colored powder. Excess is tapped off.
Repeat Layers
Steps 2–3 are repeated 2–3 times to build the desired thickness and color opacity.
Activate & Seal
An activator is applied (cures the powder), then nails are filed smooth and sealed with top coat.
Durability: Which Nail Enhancement Lasts Longer?
On raw wear time, dip nails win clearly. This surprises a lot of people who assume acrylics — given their reputation for being tough — must outlast everything else. But the polymer chemistry in dip powder creates a denser bond with less internal shrinkage stress, which translates to significantly less lifting and chipping between appointments.
Durability comparison (rated out of 10):
Standard acrylics, especially those applied with lower-grade MMA monomers, can start lifting at the cuticle edge within 7–10 days. This is a real problem — not just cosmetically, but because moisture trapped under lifted acrylic creates a breeding ground for bacterial or fungal growth (the “greenish patch” known as a “greenie”).
Dip nails, by contrast, tend to stay bonded more consistently for the full 3–4 week wear period. Their thinner profile also means less leverage stress on the nail plate — when something catches on a dip nail, it’s more likely to flex slightly rather than snap, reducing the risk of the product tearing the nail plate with it.
Dip nails last longer in everyday wear — typically 3–4 weeks vs. 2–3 weeks for acrylics. However, if you need serious structural strength for very long nail extensions or heavy-duty nail art, acrylics provide a level of rigidity dip powder simply can’t match.
Cost Breakdown: Acrylic Nails vs Dip Nails (2026 US Prices)
Upfront, the costs are similar — but the annual math tells a different story.
| Cost Item | 💅 Acrylic Nails | ✨ Dip Nails |
|---|---|---|
| Full Set (US) | $35–$75 | $35–$60 |
| Full Set (Canada) | CAD $40–$80 | CAD $40–$65 |
| Fill / Refill | $20–$40 per visit | N/A (new set each time) |
| Appointment Frequency | Fill every 2–3 weeks | New set every 3–4 weeks |
| Appointments/Year (est.) | 17–26 visits | 12–17 visits |
| Est. Annual Cost (fills only) | $340–$1,040/year | $420–$1,020/year* |
| At-Home Kit Option | $40–$80 (difficult) | $25–$50 (achievable) |
| Removal (salon) | $10–$25 | $8–$20 |
*Dip nails require a full new set each appointment (no fills), so per-visit cost is slightly higher — but fewer annual visits brings total spend close to or below acrylics for many clients.
If budget is a major concern, consider investing in a quality at-home dip kit ($25–$50 one-time cost) for maintenance touch-ups between salon visits. Dip nails are genuinely achievable at home with practice — something that can’t realistically be said about salon-quality acrylics.
Nail Health & Safety: Which Is Better for Your Natural Nails?
This is where the difference really matters long-term. Both nail types involve some level of natural nail preparation, but the extent and chemistry involved differ significantly.
What happens to your natural nail with acrylics:
Acrylic application typically requires more aggressive nail plate etching to create the necessary surface for bonding. The dehydrator and primer strip natural moisture and oils. Over months of regular fills and removals, this repeated prep cycle can thin and weaken the natural nail plate. The strong monomer chemistry (especially MMA in budget products) can also sensitize skin over time, potentially causing contact allergies.
What happens to your natural nail with dip nails:
Dip nail prep is considerably gentler — usually just a light buff rather than deep etching. The cyanoacrylate base coat adheres well to lightly buffed nails without needing the aggressive preparation acrylics require. The result: less cumulative nail plate thinning over time. However, the cyanoacrylate itself can cause reactions in people with adhesive sensitivities — patch testing before your first full set is worth doing.
Dip nails are generally less damaging to natural nails than acrylics — particularly when compared to MMA-based acrylics. However, the single biggest nail health risk for both types is improper removal. Peeling, prying, or biting off either acrylic or dip nails can remove entire layers of the natural nail plate with them. Always insist on a proper acetone soak-off removal.
Signs your nails need a break from either type:
- → Nails feel thin, bendy, or “papery” without enhancement on
- → White spots or visible damage on the natural nail surface
- → Persistent redness or irritation around the cuticle
- → Product lifting within just a few days of application
- → Green or dark discoloration under the nail product (see a doctor)
Appearance & Design Options: Dramatic vs Naturally Polished
Your aesthetic goals may be the single most important factor in this decision — and the two nail types deliver very different looks and creative possibilities.
What acrylic nails look like:
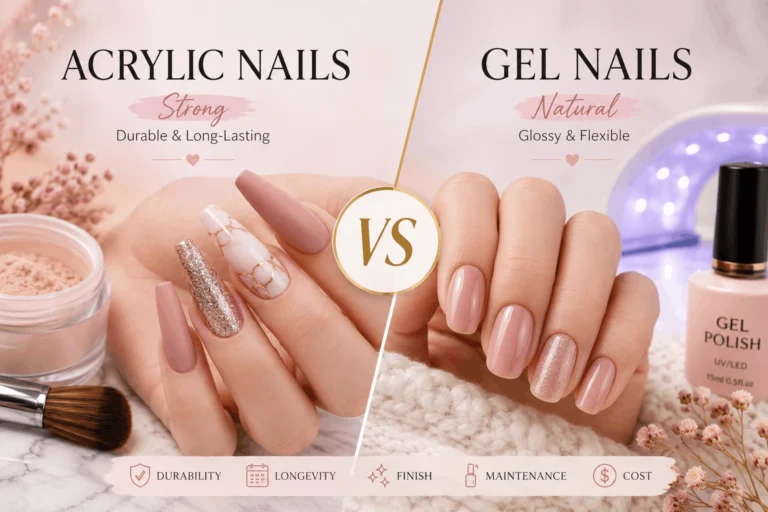
Acrylics are the canvas of professional nail art — period. Because the product can be sculpted while pliable, technicians can create any shape imaginable: coffin, stiletto, almond, ballerina, squoval, square, round, flare. You can go as long as you want. The hard surface accepts gel polish, regular polish, chrome powders, foils, 3D gel art, jewels, encapsulated flowers — everything. Coffin nails and 3D embellished nails are almost always done on an acrylic base for exactly this reason.
What dip powder nails look like:
Dip nails deliver a smooth, naturally glossy finish that looks polished and clean without looking artificial. The color range has expanded enormously — you can find dip powders in everything from barely-there nudes to deep jewel tones, holo glitters, and shimmer finishes. The finish tends to look slightly more “real nail” and less obviously artificial than acrylics, which appeals strongly to the “clean girl aesthetic” and quiet luxury nail trend of 2025–2026.
Choose acrylics if you want bold, dramatic statement nails, complex nail art, or extreme lengths. Choose dip nails if you want a naturally glossy, polished everyday look with great color variety and less obvious artificial thickness.
The Smell Factor: Why Dip Nails Win for Odor Sensitivity
If you’ve ever walked into a nail salon and been hit by that sharp, solvent-like chemical smell, you’ve experienced the liquid monomer used in acrylic applications. The odor comes primarily from ethyl methacrylate (EMA) evaporating during the mixing and application process — and in salons using cheaper MMA-based products, the smell is even stronger and potentially more harmful with prolonged exposure.
Dip nails, by contrast, use a cyanoacrylate-based bonding system that produces negligible odor during application. Most clients and technicians describe the dip process as essentially smell-free. For people with chemical sensitivities, asthma, or pregnancies (where avoiding strong chemical fumes is recommended), dip nails are often the preferred alternative.
Dip nails win on odor — it’s not even close. If smell sensitivity is a factor for you (or your salon appointment experience), dip powder nails are the clear choice.
DIY-Friendliness: Which Can You Actually Do at Home?
This is one of the biggest practical differences between the two systems — and dip nails win decisively.
DIY acrylic nails — the honest reality:
Acrylic nails at home are genuinely difficult. The monomer-to-powder ratio must be correct (too wet = lifting; too dry = rough, chalky surface). The application window is seconds. Getting the apex (the highest point of the nail architecture for strength) right requires significant practice. Most at-home acrylic kits produce results that are immediately recognizable as DIY. It’s doable, but expect a steep learning curve and the likelihood of lifting, lifting, and more lifting for the first several attempts.
DIY dip nails — genuinely achievable:
Dip nails at home are a completely different story. The process is fundamentally more forgiving — you apply base, dip or pour powder, repeat layers, activate, file, and top coat. There’s no precise mixing ratio, no brief sculpting window to master. At-home dip kits from brands like Kiara Sky, OPI, Revel, SNS, and others provide everything you need for $25–$50. With 2–3 practice sessions, most people can produce genuinely salon-comparable results at home.
Dip nails are genuinely DIY-friendly and can produce great results at home with practice. Acrylic nails at home are possible but require significant skill development and are unlikely to match professional results for most beginners.
Removal Process: How Each Type Comes Off
Both acrylic and dip nails are removed using acetone — but the process differs in time and ease.
- File down the top layer to thin the product
- Soak cotton pad in 100% acetone
- Wrap each finger in foil for 15–25 min
- Gently push off with orangewood stick
- Re-soak if resistance — never force
- Buff, nourish, and apply cuticle oil
- Light file of top coat layer only
- Soak in 100% acetone for 10–20 min
- Dip powder dissolves faster than acrylic
- Gently push off softened powder
- Less residue — often cleaner removal
- Buff and nourish with cuticle oil
Never peel, pry, bite, or force off either acrylic or dip nails. Doing so removes the top layers of your actual nail plate with the product — leaving nails thin, soft, and prone to breakage for months afterward. The acetone soak-off process exists precisely to dissolve the bond safely without taking your nail with it.
Maintenance & Upkeep: Fills vs Full Sets
One key structural difference between acrylics and dip nails affects how they’re maintained: acrylics can be filled (a fill appointment addresses only the grown-out cuticle area), while dip nails typically require a full new set at each appointment. This is because the layered dip powder builds up over the entire nail and doesn’t lend itself well to the same targeted fill technique acrylics do.
This means acrylic fill appointments tend to be shorter and cheaper than a full dip replacement — but you need them more often. Over a year, the frequency advantage of dip nails (every 3–4 weeks vs. every 2–3 weeks for acrylics) tends to roughly balance out the cost difference.
Maintenance tips for both types:
- → Apply cuticle oil daily — keeps the cuticle area hydrated and prevents lifting at the base
- → Wear rubber gloves during dishwashing and cleaning — prolonged water and chemical exposure accelerates lifting
- → Don’t use nails as tools — opening cans, scraping labels, and similar tasks put enormous stress on the product-nail junction
- → Give nails a break every 3–4 months — a week or two without any enhancement helps the natural nail recover
- → Address lifting immediately — a small amount of nail glue can stabilize minor lifts between appointments; never leave lifting nails, as moisture gets under the product
Who Should Choose Which? The Honest Decision Guide
💅 Choose Acrylic Nails If…
- You want dramatic, extra-long nail extensions
- You love bold nail art, 3D designs, or sculptural shapes
- Coffin, stiletto, or ballerina shapes are your thing
- You want the strongest possible nail enhancement
- You’re okay with salon visits every 2–3 weeks
- You want maximum design flexibility at every appointment
- You plan to add jewels, foils, or 3D embellishments
- Odor during application doesn’t bother you
✨ Choose Dip Nails If…
- You want nails that last 3–4 weeks without fills
- You prefer a lighter, more natural feel on your nails
- You’re sensitive to chemical odors or smells
- You want to try DIY nails at home
- You work in environments where strong smells are a concern
- You love a clean, glossy, naturally polished look
- You want fewer salon visits per year
- You have brittle or thin natural nails (less prep = less damage)
2026 Nail Trends: What’s Hot for Acrylics & Dip Powder
Both nail types have found clear aesthetic niches in the 2026 nail landscape — often serving completely different trend communities.
2026 Acrylic Nail Trends
- → 3D embellished nails — sculpted gel flowers, baroque pearls, and dimensional gems are everywhere on acrylic bases
- → Chrome powder nails — mirror-finish metallics applied over gel top coat on shaped acrylics
- → Extra-long coffin — the ultra-long coffin shape is having a major revival in 2026, exclusively on acrylics
- → Encapsulated art — dried flowers, foils, and glitter trapped inside clear acrylic for a “forever” look
2026 Dip Powder Nail Trends
- → Glazed donut effect — the Hailey Bieber-inspired high-shine sheer nude, now available in dip powder finishes
- → Velvet and matte dip — matte activator top coats giving dip nails a luxe suede-like finish
- → French dip nails — classic French manicure done in dip powder for a longer-lasting, chip-free French tip
- → Aura nails — soft gradient halo effects, now achievable with layered dip powder techniques
FAQ — People Also Ask: Acrylic Nails vs Dip Nails
The most common questions about acrylic nails vs dip nails, answered with expert clarity.
Acrylic nails are made by combining a liquid monomer with a powder polymer that hardens in air, allowing sculpting for extreme length and shape. Dip nails (SNS nails) are built by coating nails in a cyanoacrylate base coat then layering with colored acrylic powder — no monomer liquid required. Acrylics offer more structural strength and design versatility; dip nails are lighter, odor-free, more natural-feeling, and last longer between appointments.
Dip nails last longer on average — typically 3–4 weeks before needing replacement, vs. 2–3 weeks for acrylic nails before fills are needed. The denser polymer bond in dip powder resists chipping and lifting better than standard acrylics. With proper nail care (daily cuticle oil, gloves for housework), dip nails can sometimes stretch to 4–5 weeks.
Generally, yes — dip nails are considered less damaging to natural nails for three reasons: they require less aggressive nail prep (lighter filing), they don’t use the strong liquid monomer (EMA or harmful MMA) that acrylics need, and their thinner profile means less stress on the nail plate. However, the single biggest risk factor for nail damage with either type is improper forceful removal — always use acetone soak-off, never peel or pry.
A full acrylic set typically costs $35–$75 in the US, with fills at $20–$40 every 2–3 weeks. A full dip set costs $35–$60, with a new set needed every 3–4 weeks (dip nails can’t be filled the same way acrylics can). Annually, acrylics may require 17–26 salon visits vs. 12–17 for dip, making long-term costs broadly comparable — or slightly lower for dip users who visit less frequently.
Yes — dip nails are genuinely DIY-friendly. At-home kits from brands like Kiara Sky, OPI, SNS, and Revel are widely available for $25–$50 and include everything needed. The layered dip process doesn’t require the precise mixing ratios or sculpting technique that make acrylics difficult at home. Most people can achieve salon-comparable results after 2–3 practice sets. Acrylic nails at home, by comparison, require significant skill development and specialized products.
No — dip nails are virtually odor-free. The strong chemical salon smell comes from the liquid monomer (particularly MMA) used in acrylic applications. Dip nails use a cyanoacrylate-based system that produces no significant odor. For anyone with chemical sensitivities, scent sensitivity, or who is pregnant, dip nails are the clear low-odor choice.
Acrylic nails are significantly better for complex nail art. Their sculpted, hardened surface accepts gel polish, chrome powders, foils, 3D gel art, jewels, and intricate hand-painted designs. Acrylics can also be built into any shape — coffin, stiletto, almond — which dip nails can’t replicate. Dip powder delivers beautiful color and a smooth glossy finish, but the layered application method limits sculpting and complex art techniques.
Yes — SNS nails are dip nails. SNS stands for Signature Nail Systems, the brand that popularized the dip powder technique and whose name became synonymous with the category (similar to how “Kleenex” means tissue). When a salon advertises “SNS nails,” they’re offering dip powder nails — the same process, just with SNS-branded products. Other brands making dip powder include Kiara Sky, OPI Powder Perfection, Revel, and Gelish Dip.
Dip nails are removed by: (1) lightly filing the top coat layer to break the seal; (2) soaking cotton pads in 100% acetone; (3) placing a pad on each nail and wrapping with foil; (4) waiting 10–20 minutes (dip dissolves faster than acrylic); (5) gently pushing off softened powder with an orangewood stick. If resistance is felt, soak longer — never force. Finish with a nail buffer and cuticle oil. Professional salon removal costs $8–$20 and is always the safest option.
Final Verdict: Acrylic Nails vs Dip Nails — Which Should You Choose in 2026?
| Category | 💅 Acrylic Wins | ✨ Dip Wins |
|---|---|---|
| Durability | ✓ 3–4 weeks | |
| Structural Strength | ✓ Extensions & sculpting | |
| Odor | ✓ Virtually odor-free | |
| Design Versatility | ✓ Unlimited art | |
| Nail Health | ✓ Less prep damage | |
| DIY-Friendly | ✓ At-home achievable | |
| Salon Availability | ✓ Every salon | |
| Natural Feel | ✓ Lighter & thinner | |
| Application Speed | ✓ 30–60 min faster | |
| Nail Art Capability | ✓ 3D & sculpted art |
The honest bottom line: dip nails win more categories in 2026 — longer durability, less odor, gentler on natural nails, more DIY-friendly, and a lighter feel. But acrylic nails remain unbeatable for dramatic length, bold art, and the kind of structural nail extensions that dip powder simply can’t replicate.
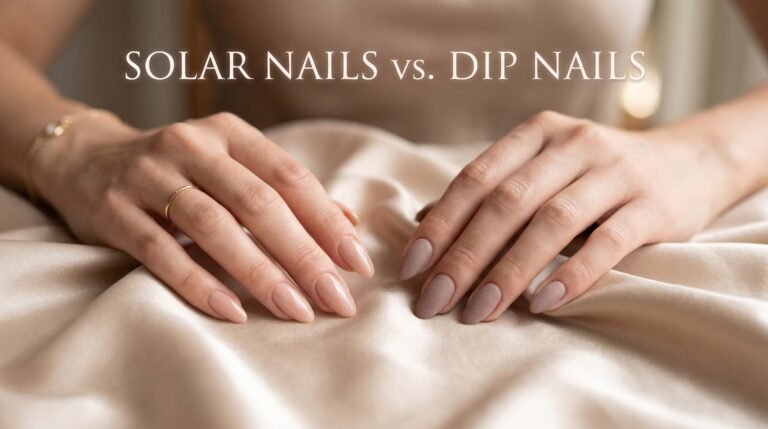
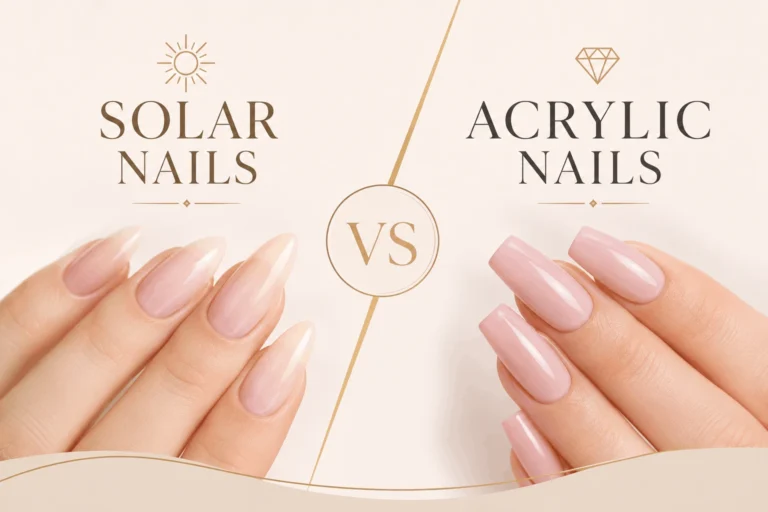
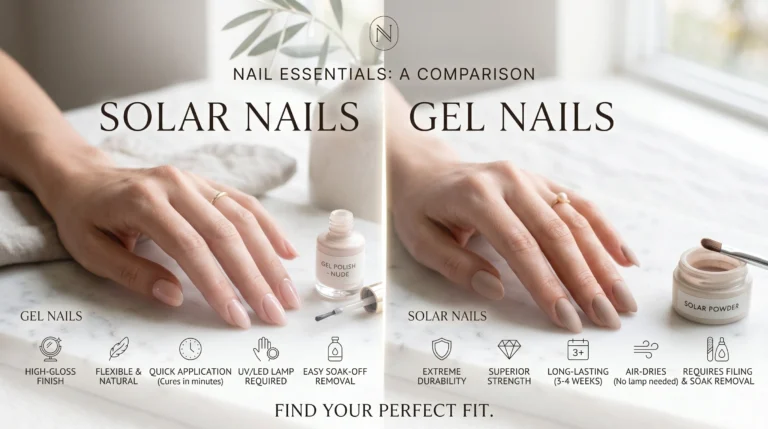
Neither is universally “better” — they serve different nail goals. If you’ve only ever had acrylics and haven’t tried dip, a single test set is worth it. And if you want the absolute best of both worlds, ask your technician about solar nails — CND’s premium acrylic system that combines acrylic durability with UV resistance and a built-in, never-yellowing gloss.
Explore More Nail Comparisons
Not sure which nail type is right for you? Browse our expert guides for every comparison that matters.