3D Embellished Nails: Designs | Colors | Tips
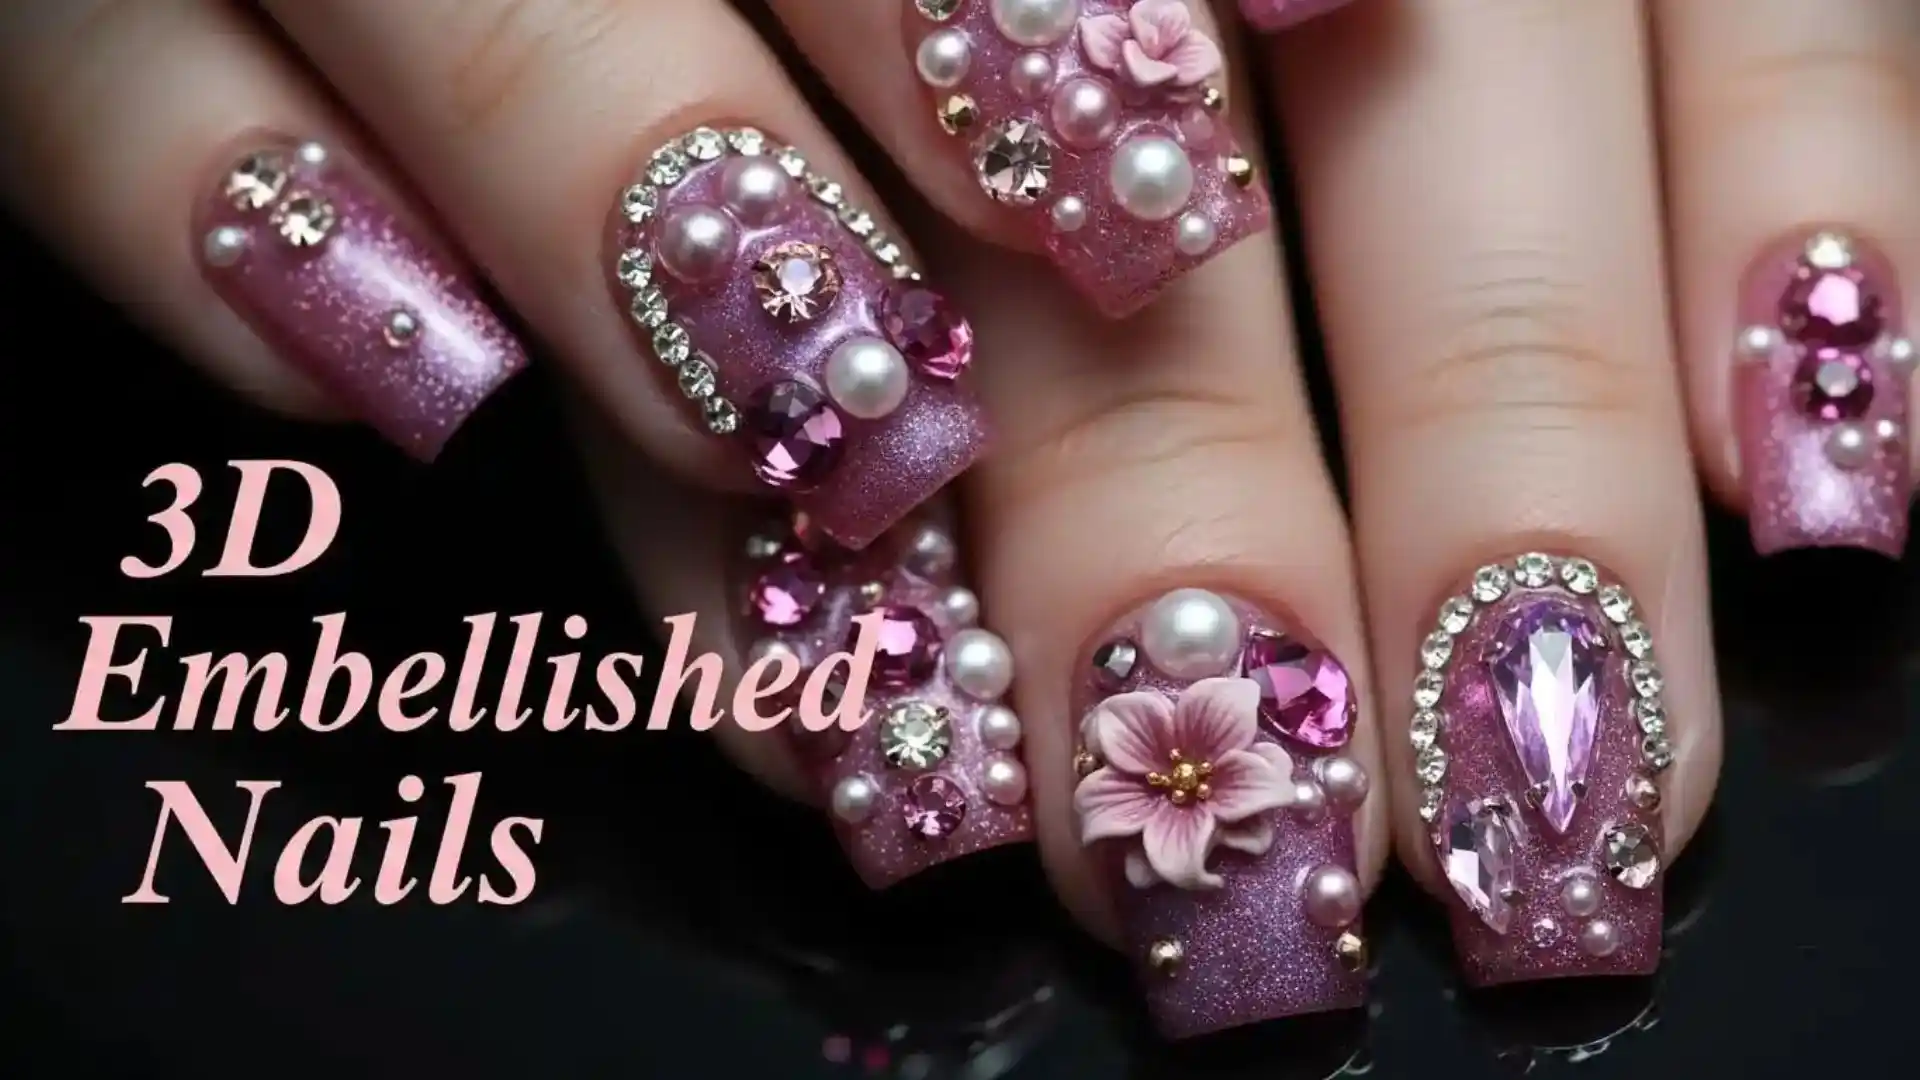
If you’re ready to take your manicure from basic to breathtaking, 3D embellished nails are the ultimate glam statement. This design style features raised elements like rhinestones, pearls, chains, sculpted gel art, and charms turning your nails into tiny, wearable jewelry pieces. It’s bold, luxurious, and perfect when you want your nails to stand out literally.
See more info on solar nails.
Popular Types of 3D Embellishments
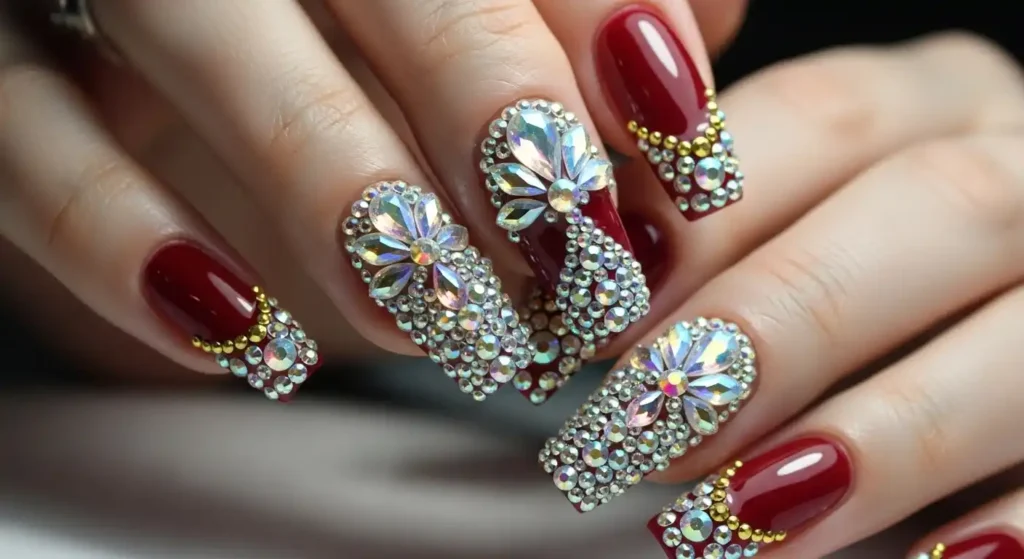
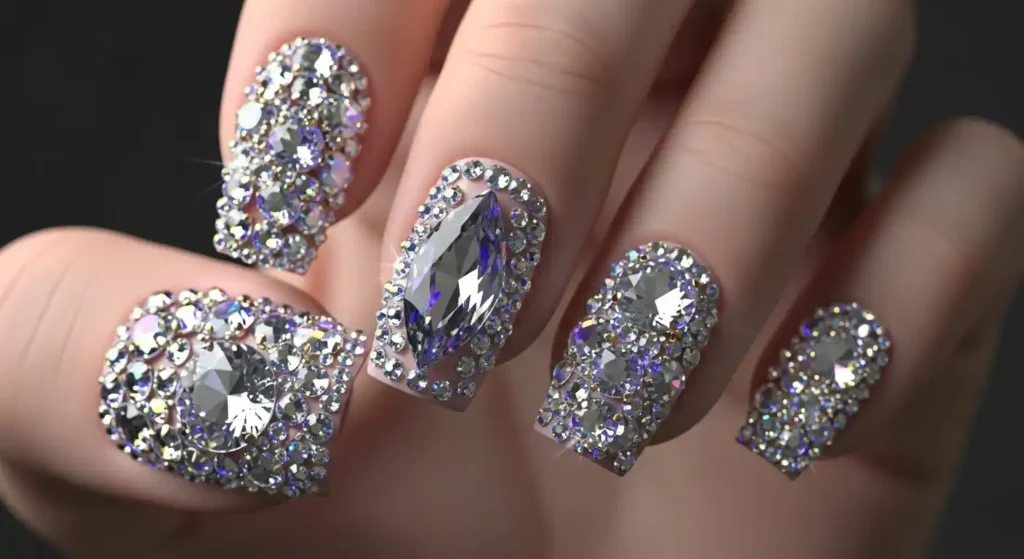
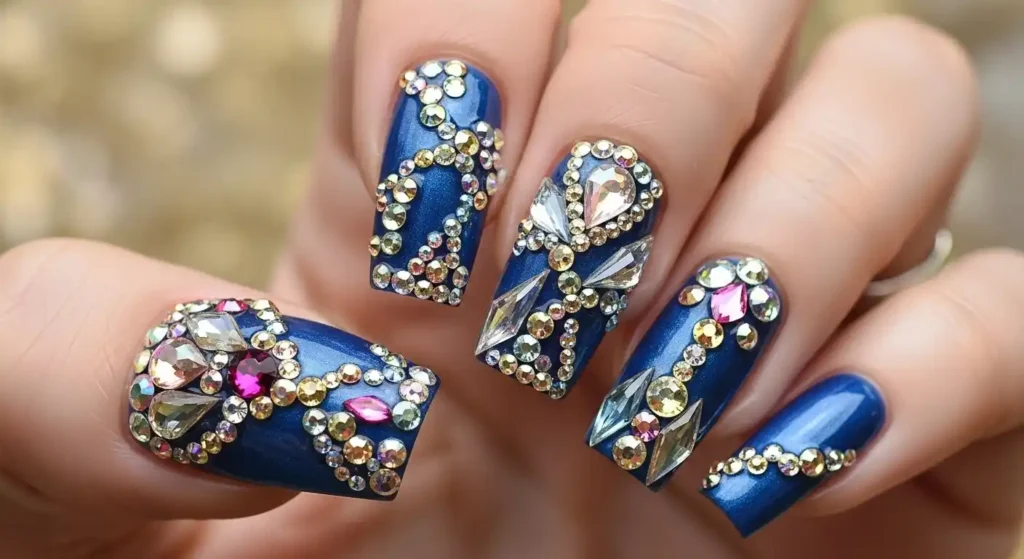
Rhinestones & Crystals: The Crown Jewels of Nail Art
When it comes to 3D nail glam, rhinestones and crystals are hands-down the most iconic. They instantly elevate any manicure, catching the light with every move. Whether you prefer subtle sparkle or full-on bling, these gems bring a rich, eye-catching finish to your nails.
🎨 Popular Styles with Rhinestones
✅ Clear crystals on a nude base – timeless, bridal, and elegant
✅ AB rhinestones over pastel polish – reflect rainbow hues and add ethereal vibes
✅ Color-matched stones (e.g. red on red) – bold, luxurious, and coordinated
✅ Full bedazzled accent nails – a single nail covered edge-to-edge in rhinestones
✅ Framing stones – tiny crystals outlining the nail or French tip
You can mix crystal sizes (SS3 to SS20+) for a multi-dimensional effect or use matching ones for symmetry.
🛠 How to Apply Rhinestones Correctly
1. Prep your base:
Start with clean, polished nails. Gel or builder base is ideal for a longer-lasting hold.
2. Use precision tools:
Grab a wax pencil or rhinestone picker to place each gem exactly where you want it.
3. Secure with builder gel or resin glue:
Use a small drop of nail glue or clear builder gel where you want each stone. Press it in gently, then cure under a UV lamp if using gel.
4. Seal smartly:
Apply top coat around the rhinestones (not over them) to preserve their sparkle and prevent lifting.
💡 Pro Tip: Add smaller crystals in between larger ones for a “cascading sparkle” effect that looks fluid and luxurious.
💅 Why Clients Love Rhinestone Nails
✔ Instant glam without being too heavy
✔ Great for weddings, parties, and festive seasons
✔ Reflect light beautifully for that “bling” moment
✔ Easy to mix with other trends (like ombré or chrome bases)
✔ Offers both bold and minimal design options
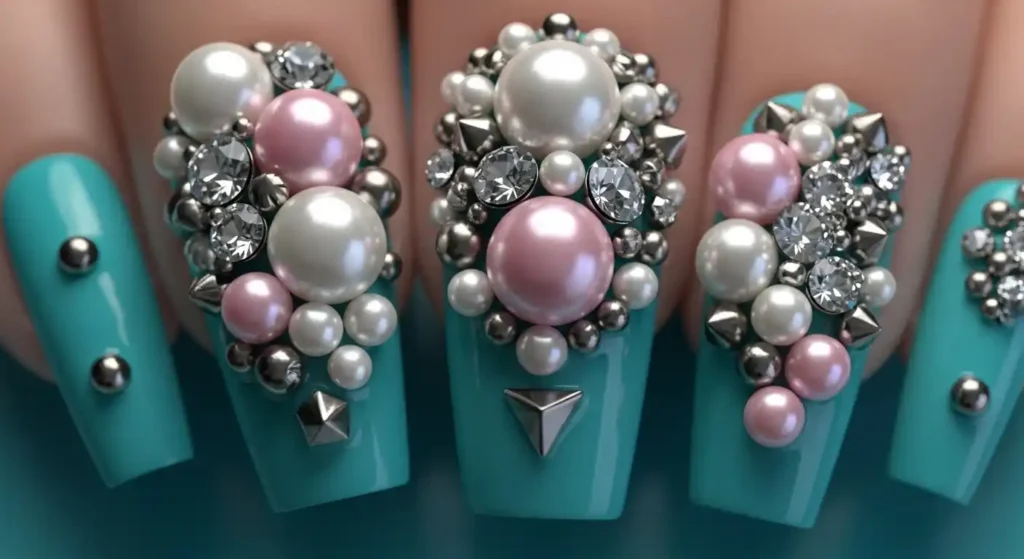
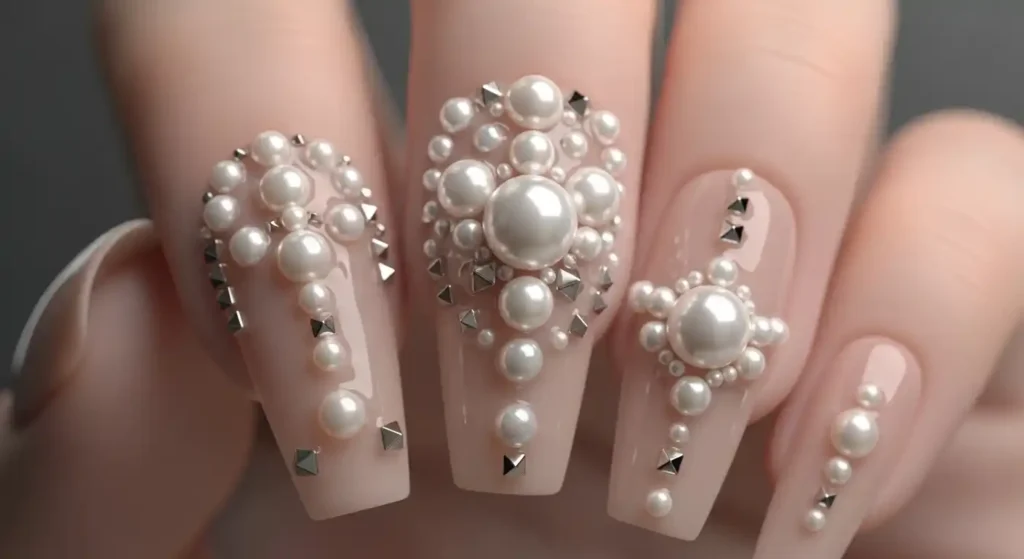
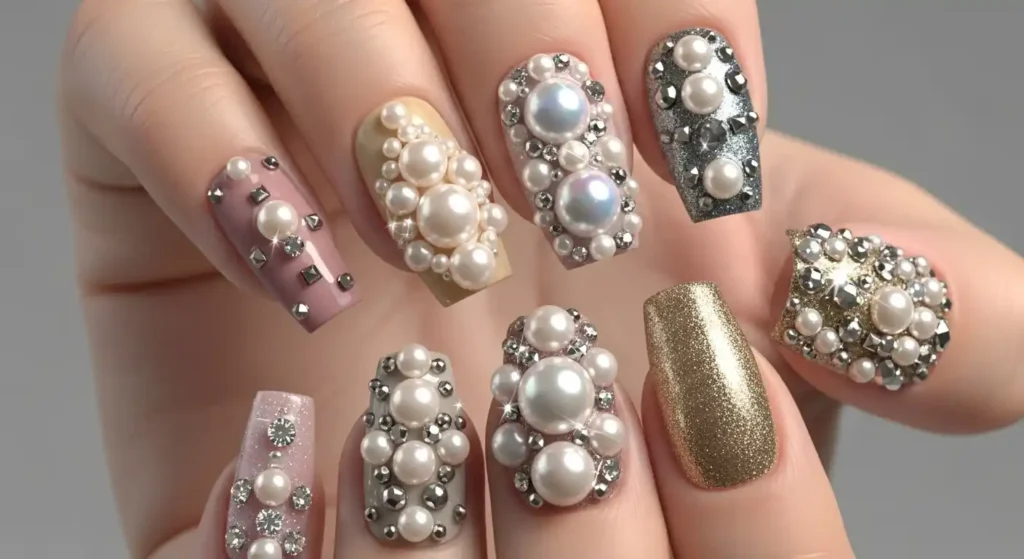
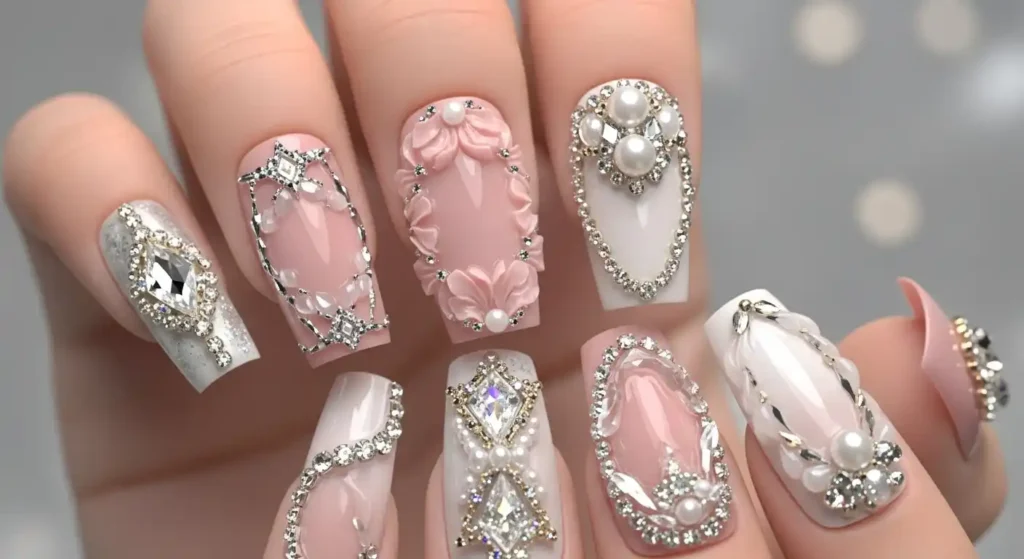
Pearls & Studs: Soft Elegance Meets Edge
If rhinestones are all about sparkle, pearls and studs bring a whole different kind of luxury — soft, subtle, and effortlessly elegant. From romantic bridal sets to minimalist chic, these embellishments add depth and texture to your nails without overwhelming the design. Pearls give off a classic, graceful vibe, while metallic studs add contrast and structure — perfect for mixing soft and edgy styles.
🎨 Popular Ways to Use Pearls & Studs
✅ Single pearl accent on nude polish – clean, timeless, and delicate
✅ Pearl clusters on ring fingers – ideal for bridal and special occasion looks
✅ Gold or silver studs with matte black polish – bold and fashion-forward
✅ Alternating pearls and studs down the nail – symmetrical and modern
✅ Mini pearl halos around the cuticle – soft glow at the nail base
Both elements work beautifully alone or combined with minimalist polish for a balanced, stylish finish.
🛠 How to Apply Pearls & Studs Properly
1. Use a sticky base or gel:
Apply a small dot of nail glue or builder gel where you want the pearl or stud. For long wear, builder gel is more secure.
2. Pick and place:
Use a wax pencil, dotting tool, or tweezers to gently place each piece. Press lightly to set it into the gel.
3. Cure (if gel) or air dry (if glue):
Use a UV/LED lamp to cure builder gel placements, or allow glue to fully dry before adding topcoat.
4. Topcoat carefully:
Seal around the pearls or studs — not directly over them — to avoid dulling the shine or texture.
💡 Pro Tip: Mix different sizes of pearls or studs to create a flowing, natural layout — similar to jewelry detailing.
💅 Why Pearls & Studs Are Trending
✔ Less flashy than rhinestones, perfect for soft glam styles
✔ Ideal for weddings, date nights, or minimalist nail lovers
✔ Easy to mix with matte, chrome, or sheer polish bases
✔ Adds just the right amount of 3D detail without being bulky
✔ Great on all nail shapes — from short almond to long square tips
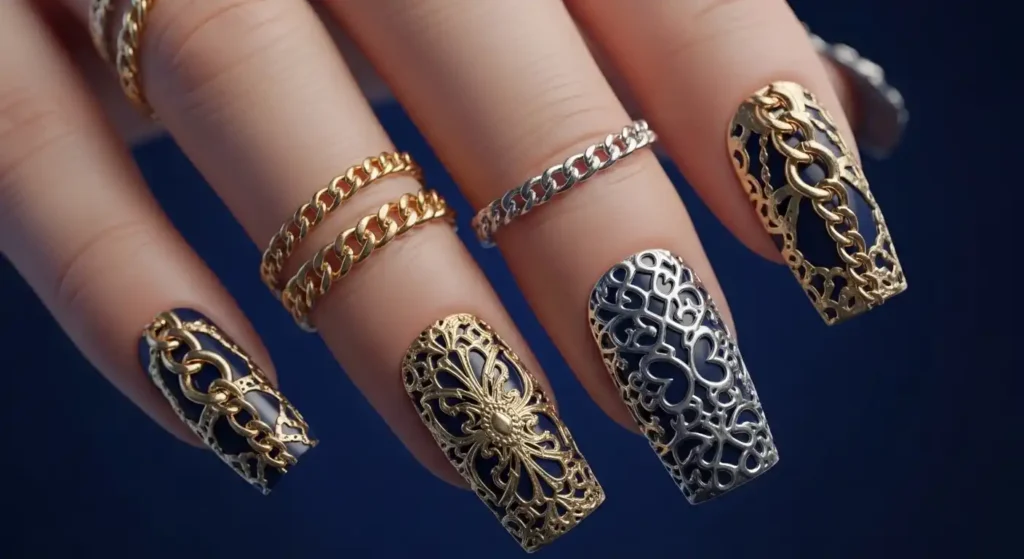
Chains & Metal Frames: Edgy, Bold, and High-Fashion
Want to add runway-worthy drama to your manicure? Chains and metal frames take 3D nail art to a whole new level. These bold, industrial-inspired embellishments are perfect for edgy, fashion-forward nail lovers who want their hands to make a statement. Whether you’re going for grunge-glam, punk rock, or futuristic luxury, chains and frames give your nails structure, attitude, and shine.
🎨 Popular Chain & Frame Designs
✅ Mini gold chain across the cuticle – adds delicate edge without overdoing it
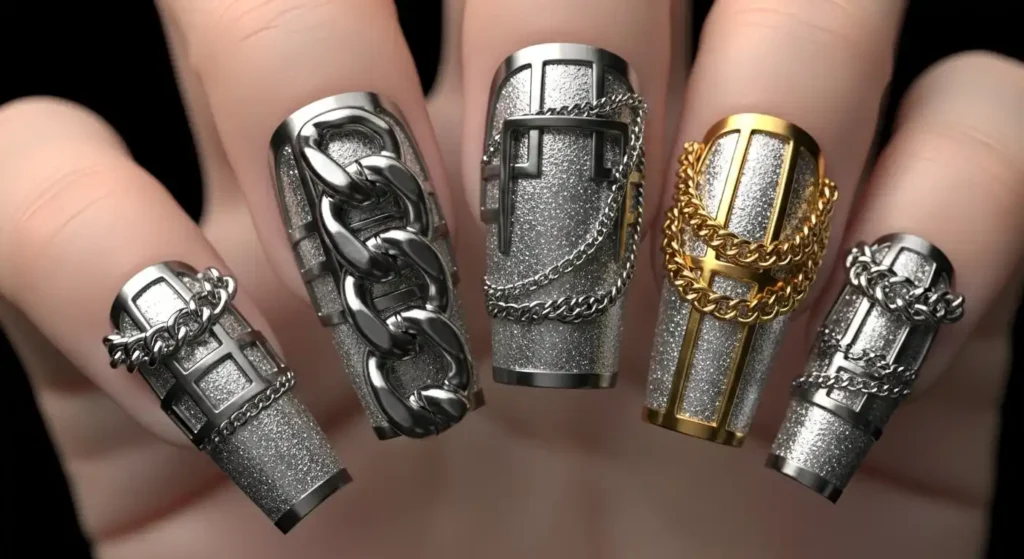
✅ Silver frame bordering the entire nail – creates a futuristic or architectural look
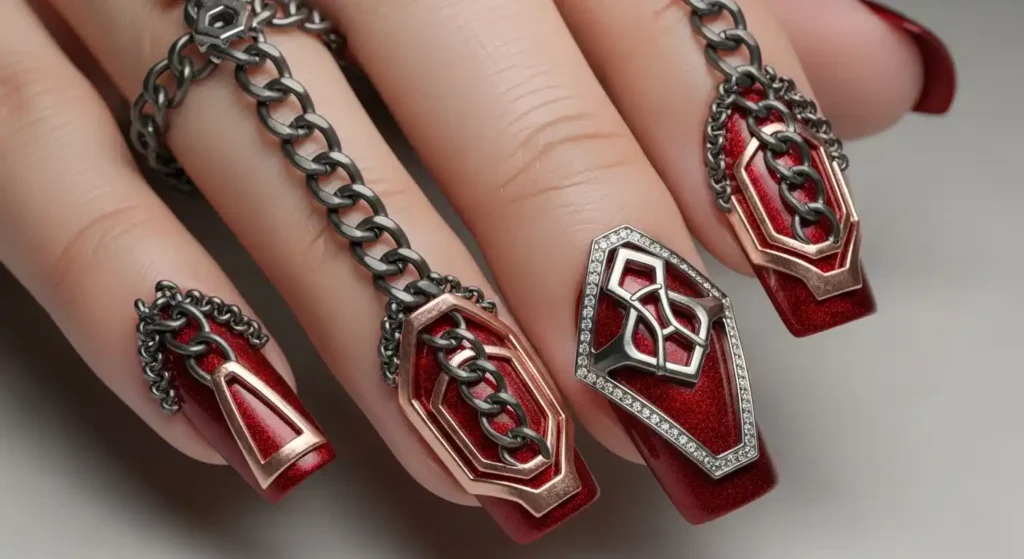
✅ Mixed metals (gold, rose gold, silver) – layered for a rich, multidimensional finish
✅ Chains connecting two nails – dramatic and editorial, perfect for photoshoots or bold styling
✅ Cross-hatched wire designs – adds texture and sharp contrast on a matte base
These embellishments work great on both glossy and matte backgrounds, depending on the mood you want to set.
🛠 How to Apply Chains & Frames Securely
1. Choose nail-safe metal:
Use lightweight nail art chains and flexible metal decals designed specifically for nail application — avoid heavy jewelry chains.
2. Measure and cut (if needed):
Cut the chain to fit your nail length or desired placement. Pre-shape frames to fit the nail’s curve if needed.
3. Apply with builder gel or nail glue:
Place a small amount of builder gel or strong glue where the chain or frame will sit. Use tweezers to lay it down precisely.
4. Secure and cure:
If using gel, cure under a UV/LED lamp for 60 seconds. Then, go around the chain/frame with a topcoat (don’t coat over it) to lock it in.
💡 Pro Tip: Use chain only on accent nails for better comfort and wearability. Save full-frame borders for longer nail shapes like coffin or square.
💅 Why Chains & Frames Are Trending
✔ Brings a fashion editorial feel to everyday nails
✔ Adds structure and dimension without sparkle or shine
✔ Looks amazing in close-up photos and videos (great for social content!)
✔ Works well with other 3D elements like studs or gems
✔ Perfect for long acrylics or gel extensions that can carry the weight
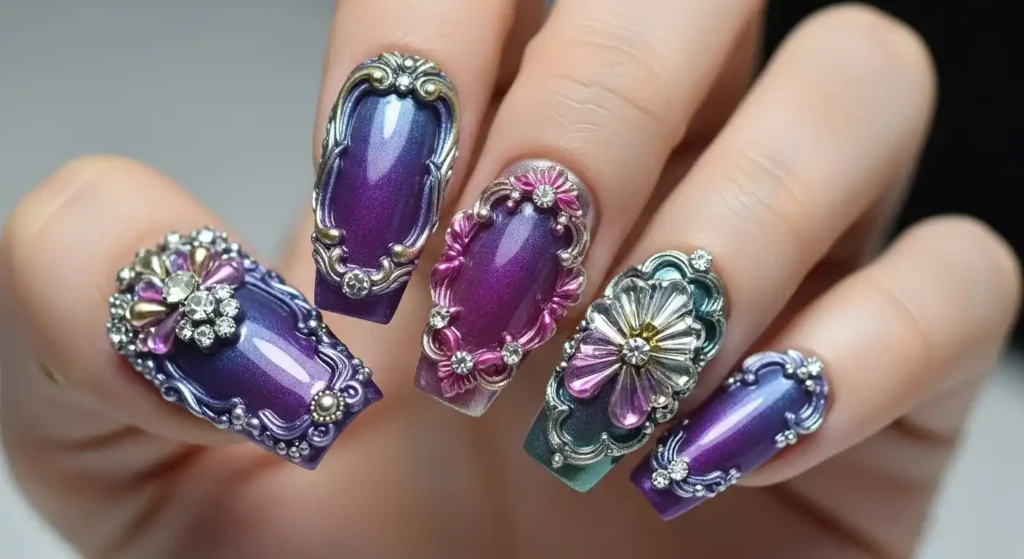
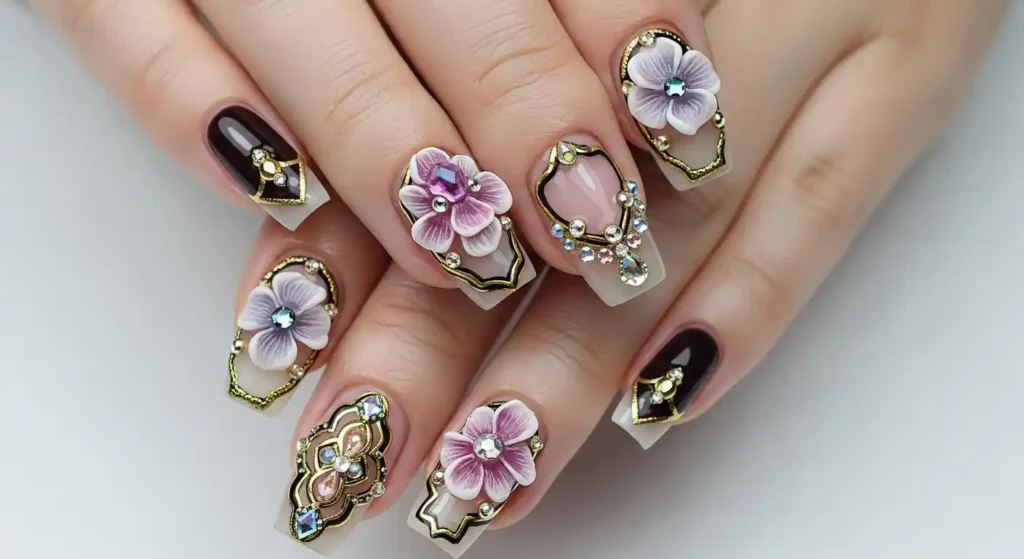
3D Gel Sculpting: Tiny Works of Art on Your Nails
If you’re ready to turn your nails into actual mini masterpieces, 3D gel sculpting is the technique to know. This style uses thick builder gel or acrylic to create raised, hand-crafted designs directly on your nails. Think flowers, bows, butterflies, hearts, ribbons — whatever you can imagine, a skilled artist can sculpt it. It’s delicate, high-end, and made to wow.
🎨 Popular 3D Gel Sculpted Designs
✅ Roses & Blossoms – a timeless favorite for weddings and romantic looks
✅ Butterflies with layered wings – adds a soft, feminine touch
✅ Ribbons & Bows – playful and cute, often seen in kawaii-style nail art
✅ Snowflakes, shells, hearts – themed art for any season or mood
✅ Baroque & swirl patterns – elegant and dramatic for luxury sets
Each sculpted design is custom-built using a brush and gel or acrylic, meaning no two nails are ever exactly the same.
🛠 How 3D Sculpted Nail Art is Done
1. Base prep:
Apply a solid gel or acrylic base first. The 3D gel layers need a firm foundation to stick and hold shape.
2. Use builder gel or acrylic:
Dip a small brush into builder gel or colored acrylic. Build the shape slowly, layer by layer. Cure each layer under a UV lamp (for gel) before moving to the next.
3. Shape & refine:
Artists use tiny tools like sculpting brushes, dotting tools, or silicone pushers to shape the design precisely before curing.
4. Add color or details (optional):
Once sculpted and cured, designs can be painted with gel polish or left sheer for a glass-like effect.
💡 Pro Tip: Choose soft colors (pinks, lilacs, ivory) for a romantic style, or go bold (black, red, gold) for a more high-fashion finish.
💅 Why 3D Gel Sculpting is Loved by Nail Art Fans
✔ 100% customizable — your nail design is literally one-of-a-kind
✔ Long-lasting if sealed properly with top coat
✔ Can be dainty or dramatic depending on size and style
✔ Looks incredible in high-definition photos (perfect for Instagram & Pinterest!)
✔ Ideal for special occasions like weddings, birthdays, or festivals
🛠 How to Achieve the 3D Embellished Nail Look
1. Start with a solid base:
Begin with a strong gel or acrylic base. This provides the durability needed to support 3D elements without lifting.
2. Choose your 3D pieces:
Pick your embellishments based on the look — glam, romantic, edgy, or playful. Lay them out before application for placement ideas.
3. Apply with nail glue or builder gel:
Use a small dot of strong nail glue or a bit of uncured builder gel to place the 3D piece. Use tweezers for accuracy. Cure the gel under a UV/LED lamp if needed.
4. Secure with top coat (optional):
Seal the areas around the embellishment with clear gel top coat to prevent lifting. Avoid coating the entire charm if you want to preserve its shine or texture.
💡 Pro Tip: Use a mix of flat and raised elements for balanced design. Overloading all ten nails with bulky charms can feel too heavy — focus on accent nails!
💅 Why 3D Embellished Nails Are So Popular
✔ They turn your nails into a fashion accessory
✔ Perfect for events, weddings, photoshoots, and festivals
✔ Limitless design possibilities — from chic to extra
✔ Combine with other nail trends (like chrome or ombré) for custom looks
✔ Works on both natural and extended nails (especially acrylic or gel extensions)
🔍 Best Nail Shapes for 3D Embellished Nails
📌 Coffin & Stiletto – Give more surface area to build up 3D elements
📌 Almond – Elegant with just enough length to play with dimension
📌 Square – Great for symmetrical charm layouts and pearl clusters
Short nails can rock 3D designs too — just use mini pieces and simpler placement.
💡 Design Ideas You Can Try
- Crystal Garden: Pastel base with rhinestone flowers and sculpted leaves
- Gothic Luxe: Black matte polish + gold chain accents and spikes
- Dollcore: Light pink base with 3D bows, hearts, and pearls
- Celestial Mood: Navy background + 3D stars, moons, and galaxy foil
- Bridal Fantasy: Nude or ivory base with lace designs and pearl-studded tips
🧼 Maintenance Tips
- Be gentle with your hands — 3D nails can catch on fabrics or hair
- Avoid hot water for long durations (it may weaken glue)
- Use cuticle oil daily to keep the nail bed healthy
- Wear gloves while doing chores to prevent accidental breakage
- Schedule regular fills or re-attachments if you wear gel or acrylic
3D embellished nails are more than just a trend — they’re a creative statement. Whether you’re adding sparkle for a special day or just love the drama of dimensional art, this nail style guarantees attention.